Creating a GnuPG Key
Overview
Part 1 summarized the two common public key technologies (aka PKI for Public Key Infrastructure) used to secure email communications. Here in Part 2 I will take you through the steps to generate your own GnuPG key pair on the Microsoft Windows Operating System. Why GnuPG and not PGP? For the most part the two are interchangeable. Since GnuPG is freely available, I decided to demonstrate it first. One drawback of the GnuPG, is that it does not integrate seamlessly into 64-bit versions of Microsoft Outlook. Because of this, I will first show how to enable
Thunderbird to send and receive encrypted email messages.
Installing GnuPG on Windows
Please note that I used Windows 7 Enterprise in this example.
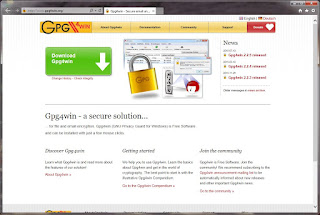
In your browser, navigate to
http://gpg4win.org/.
 |
| http://gpg4win.org/ |
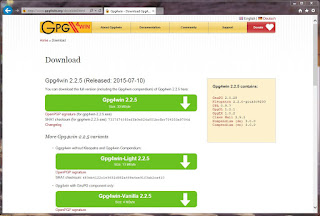
Click on "Download Gpg4win". You should be at this page. At the time of this post, the current version is 2.2.5.
 |
| http://gpg4win.org/download.html |
Now click on the uppermost download button. You will be presented with the dialogue box asking if you want to save the file or run (execute) the file.
 |
| Save Dialogue |
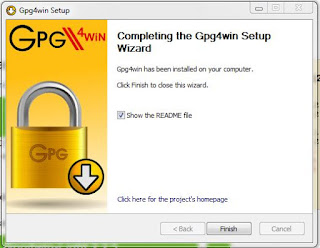
Select 'Run' and accept the default actions of any dialogue box presented during the installation process. If successful, the last screen displayed should be this.
 |
| Gpg4win Wizard Complete |
Please unselect the "Show the README file" and then click "Finish". At this time you have successfully installed a Windows version of GnuPG on your computer.
Creating a GnuPG key
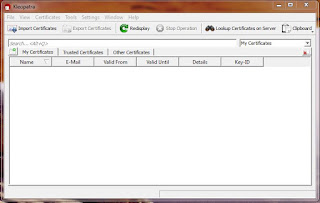
The installation of Gpg4win installed the Kleopatra key management tool as one of the components. Navigate through the start menu and launch Kleopatra. The path through the menus should be "Start -> All Programs -> Gpg4win -> Kleopatra".
 |
| Kleopatra Main Window |
Start the new certificate process by selecting File -> New Certificate from the top menu or by typing Ctrl-N (press Control-Key and 'N' key simultaneously). You will be presented with a dialogue to choose the certificate format.
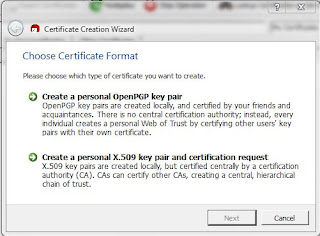 |
| Certificate Format |
Choose "Create a personal OpenPGP pair", and click on Next. On the next screen you will enter details about your certificate.
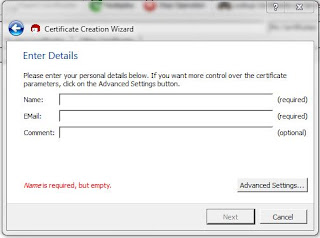 |
| Certificate Detail Form |
Two of the three fields on this form are required. Fill in the Name and EMail fields with your name (usually full name) and email address. You can use the Comment field for any purpose. Some people may choose "Work" or "Home" for this field. For the time being we will not need to be concerned with any of the Advanced Settings. When you have filled in the fields, click on Next.
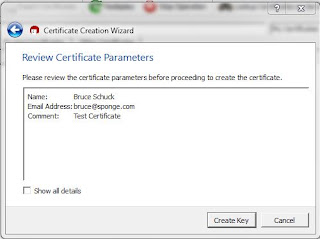 |
| Certificate Review |
On the Review Certificate Parameters screen you can confirm the values of the fields entered on the previous form. If no corrections are necessary, click on Create Key. During the key creation you may be asked to move the mouse pointer or type in random characters. When the key pair is generated, you should the following screen.
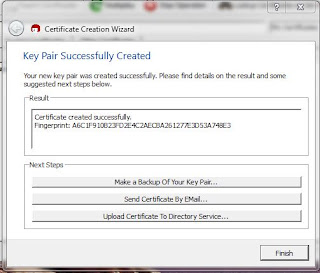 |
| Certificate Complete |
Congratulations! You have successfully generated an OpenGPG key pair. When you click on Finish, you will be returned to Kleopatra's main screen and see your certificate listed in the window.
Summary
While composing these steps I realized that if you are following these steps you may not know someone that you can send and receive test messages with. So before we move on to configuring an email client (Thunderbird) to utilize GnuPG, I should go over how to import someone's public key to your keyring. There are a few ways to accomplish that, and that will be covered next in Part 3.
Related Posts


